What Is Concept Generation?
Product concept generation is a process that starts with a list of parameters set by the customer regarding his needs and specifications. Based on the requirements, concept generation helps to pinpoint a variety of possible solutions and ideas that answers those needs.
Many engineering companies tend to overlook this phase because it may seem like a waste of time. It’s easier to run away with the first idea and start the design process.
However, looking at the problem from different angles can result in concepts that you may not have come up without some deep thinking. Hence, it is a crucial part of the product development process.
Concept generation for product planning may be viewed as a similarly effective and forward-thinking mechanism as lean manufacturing is for production and concurrent engineering for the whole product development process. A systematic approach to the different sides of a product journey pays dividends at the end.
Steps for Creating Concepts
The conceptualisation phase itself is a step in the larger engineering process, which goes like this:
- Identifying customer needs
- Defining the problem and objectives
- Concept generation
- Drafting and analysis
- Detailed design and drawings
- Creating a prototype
- Testing
- Final delivery
Of course, the practical engineer in you probably says you usually lack the time and resources to touch half of those points. If your client is after a one-off machine, you probably do not have the money to create a full-scale prototype for rigorous testing.
This, however, does not mean that you should skip everything other than customer needs, engineering drawings and manufacturing. It only means that you are probably more restricted when it comes to trying out wholly new ideas because you cannot test if they actually work out as planned.
Even if you have to stay on the safer side, going through the concept process is of help when looking to provide the best possible solution to answer the need. So let’s take a look at what it entails.
Product concept generation steps are as follows:
- Understanding the problem
- Researching established solutions
- Brainstorming & ideation
- Assessing the ideas & solutions
- Picking the winner & start working on it
Step 1 – Understanding the Problem
The first step is the basis for all the next ones. Not managing to get this one right will render the whole development process futile.
Bear in mind that you are the engineer and the customer may not always know what kind of information is actually necessary. They may have a vision for a solution which ignores many important details.
Thus, you have to be really methodical at this stage. Visit the site (e.g. production facilities), ask about the project goals, who must benefit and how, what are the requirements for the design, etc.
All this contributes a great deal in the next steps. You will know what questions to ask yourself before putting anything to paper (or CAD).
Step 2 – Researching Established Solutions
Before getting to generating your own designs, expose yourself to the available information. Researching solutions for the same and similar problems is a great way to kickstart the product development process.
Your best friend at this step is Google, for sure. You can also find other great sources like GrabCAD from our list of best sites for mechanical engineers. Look up everything and anything related to your problem.
There is a reason, however, why the customer is turning to you. Maybe he didn’t find what he was looking for, although it exists. Maybe he needs a customised solution. Maybe there is nothing available on the market that could satisfy the requirements.
Whatever the answer, there will be solutions similar enough. Exposing yourself to them is necessary before going on to the next stage.
Maybe your customer needs a solution for opening doors softly so the wind couldn’t blow it wide open with a bang. And nothing like that exists. Go on doing the research about mechanisms for closing doors softly. You may find a lot of inspiration if you do not limit yourself too narrowly.
That is also why seasoned engineers are so valuable. Even if they have not worked on a project with a similar scope, bringing in the experience from a variety of different projects will help immensely. Implementing an idea that answers a similar problem may need some adjusting, but it’s a good start.
Step 3 – Brainstorming and Ideation
Now we get to put the research phase behind us to move on to the creative side of the design process. As we outlined in our tips for engineers article, we always advise generating at least 3 solutions to choose from.
Of course, on your way to these options, you will come up with a lot more ideas. But the 3 that pass the initial judgment will go into more detail. This includes the use of manufacturing technology, an in-depth analysis of the most difficult sub-assemblies, etc. We’ll get to that in Step 4.
Techniques for Producing Concepts
Engineers are famous for their ability of critical thinking. We are also notorious for the ability to shoot down ideas that do not make sense from the start.
When looking to create a new concept for a product, the latter quality is not really useful. At least not in this stage. It is better to switch off the critical thinking part when looking to come up with a variety of ideas.
Although the ideas will include a lot of rubbish, even the worst ones may contribute to the final concept in one way or another. A single design element stemming from a horrible initial idea is still very valuable.
The most important part is to make sure your imagination can flow freely. It is a skill that requires development, for sure. A great resource for finding ways to develop that skill is Thinkertoys by Michael Michalko.
Here, we are going to outline the most common strategies to come up with some ideas.
Brainstorming
Let’s start with the most famous one of them all – brainstorming. This is a group exercise that is based on two premises – quantity breeds quality and deferring judgment.
The optimal size for a group is between 5-10 people and there should be a designated group leader. A session can last anywhere from fifteen minutes to an hour and there is one goal only – to come up with a lot of ideas. Of course, first you need to lay out the problem details you pinpointed in the first step.
Everyone will have to work together to continue developing each other’s ideas. A good practise to follow is answering an idea with “Yes, and…” rather than “Yes, but…”. This will set the tone for the whole process.
The group leader can change the subject once a single idea has been followed through and rapid progress wanes down.
An important aspect here is that the brainstorming session can, and maybe should, include people from outside the circle of design engineers. These people can bring in a fresh view without much of the restricting logic. Big companies often have this type of people on the team who will never make the next step with the project. Their goal is to contribute solely at this stage.
It is the product development team’s task to later assess these ideas and choose whether using them in the concept is realistic or not.
Reverse Brainstorming
This is a combination of brainstorming and a technique called reversing. Engineering questions tend to be something like “How can I solve this problem?” and “How could I make this work?”. Reversing means asking “How can I make this problem worse?” and “How could I break it?”.
This gives a whole new perspective which can lead to great results.
Once you have created a set of reverse questions, you can start solving them. If your brainstorming buddies come up with ingenious ideas for breaking things, they may stumble upon something that is also actually useful for preventing this from happening.
You do not have to limit yourself to asking questions only, though. Statements about the “common understanding” work just as well.
One of the more famous examples from the Thinkertoys book is attributed to Alfred Sloan who reversed the idea that a person must first buy a car before he can drive it. The reversal meant that you can buy it while driving the car, hence coming up with the idea for instalment buying.
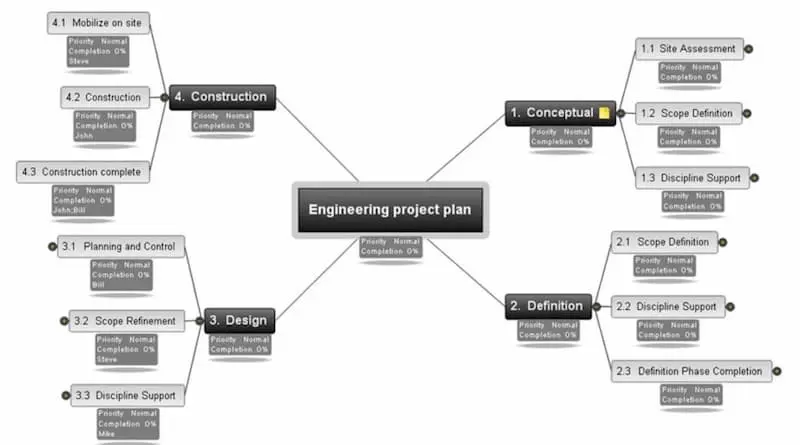
Mind Maps
Mind mapping is a great tool for someone who likes organised thinking. Someone like… an engineer.
You can take your main problem as the central word and write it down on paper. Then you just start writing down everything that relates to this word. And do the same, in turn, for those newly written-down words.
At last, you end up with a mind map with a lot of branches.
When creating a new product for your client, you can also start with the central word just being “the product” and add the requirements as the first branches – safety, ease of use, quickness, etc. When you add terms that relate to these qualities, you may well come up with a concept that covers all the necessary functions.
Just beware of the possibility of creating a feature shock. A single item does not always have to resolve all the issues in the world if it makes using it more complicated. Or results in a hideous design.
6-3-5 Method
Another team effort that requires 6 people. Each writes down 3 ideas over a 5-minute period. Now you know what the numbers stand for.
First, each individual writes down 3 ideas for a solution. Again, the problem has to be clearly defined from the start.
Next, they pass their paper along to the person sitting next to them. He can then further develop these ideas or add new ones based on the ideas he sees. Seeing another person’s perspective can be a strong ignitor of a wholly new concept.
The same process will be done until each person gets their original paper back after a full circle. And now you have 108 ideas in total. Yes, some of them are very raw and partial. But you just spent less than an hour (including setting up the meeting and explaining what is going to happen) to generate a wide range of concepts for your product.
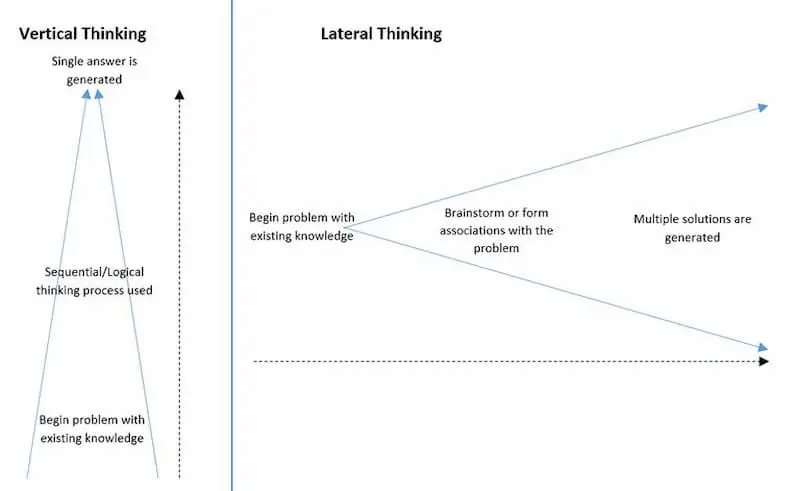
Lateral Thinking vs Vertical Thinking
Lateral thinking is definitely one of the most important elements of product design concept generation. Although we have already addressed it in principle, it will not hurt to lay it out.
Lateral thinking refers to a broad search for a large number of possibilities and ideas. The aim is to avoid going in-depth with any of this or even pass judgment. Sure, passing the opportunity to make a joke about your colleague’s lack of intelligence may be tough to resist, but do your best.
Vertical thinking is the opposite, whereby you analyse one solution in-depth for its pros and cons. As this is part of an engineer’s nature, resisting the temptation needs some discipline and willpower.
But if you succeed at that, you will get the opportunity to do just that in the next stage.
Step 4 – Assessing the Ideas and Solutions
Now you have a wide range of different proposals on the table. Sure, most of them cannot solve your problem. But out of the plethora of ideas, there must be some good ones. How to sift through them all?
Now is the time to bring logic back into action. A sigh of relief – finally!
First, go over the ideas and choose a few that look like great candidates – 3 to 5 concepts would be great.
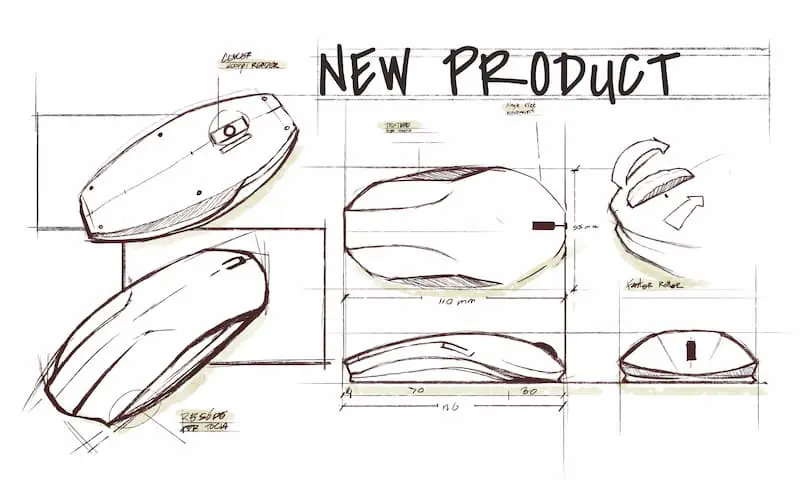
Secondly, do some sketching for the select few. Besides being just illustrations, sketching can bring out the pros and cons of many of these ideas. Also, turn your attention to the more difficult aspects of each concept and try to come up with the general idea of how to solve them. This will help to assess many of the crucial points here.
Next, build up an assessment form or scoring matrix. It can include everything that is necessary for this project. Every idea gets a rating which is weighed. The scoring points can include manufacturing cost, manufacturability, time to design, efficiency, durability, aesthetics, etc.
Maybe cost is the most important aspect, so give it a weight of 1 while aesthetics is a nice-to-have and comes with a weight of 0.25. After scoring each aspect in the same scale (e.g. 10 points max), you get your winning concept.
Step 5 – Pick the Winner and Start Working on It
So here you have it – the winning concept. Now it’s time to start the process of product development. Next comes specific design selection. There, you can also make use of powerful CAD software features like generative design to aid in the process of creating highly optimised designs.
During that phase, you should also know the material or at least the material class because it determines the thicknesses and overall geometry of the part. Last but not least comes the making of production drawings. Unless you can manufacture your parts straight from 3D files.
Engineering is all about problem solving. The customer has a need for something and he turned to you to get it solved. Doing your best entails putting it all out on at every stage of the process.
Sure, time restrictions can breathe down your neck but the initial phase for finding ideas does not take that long actually. Finding the right one, though, will help to dramatically diminish the time spent in the next phases as well as overall costs.
And if you really are in a hurry, remember that generating two ideas is still better than one.


No comments:
Post a Comment